
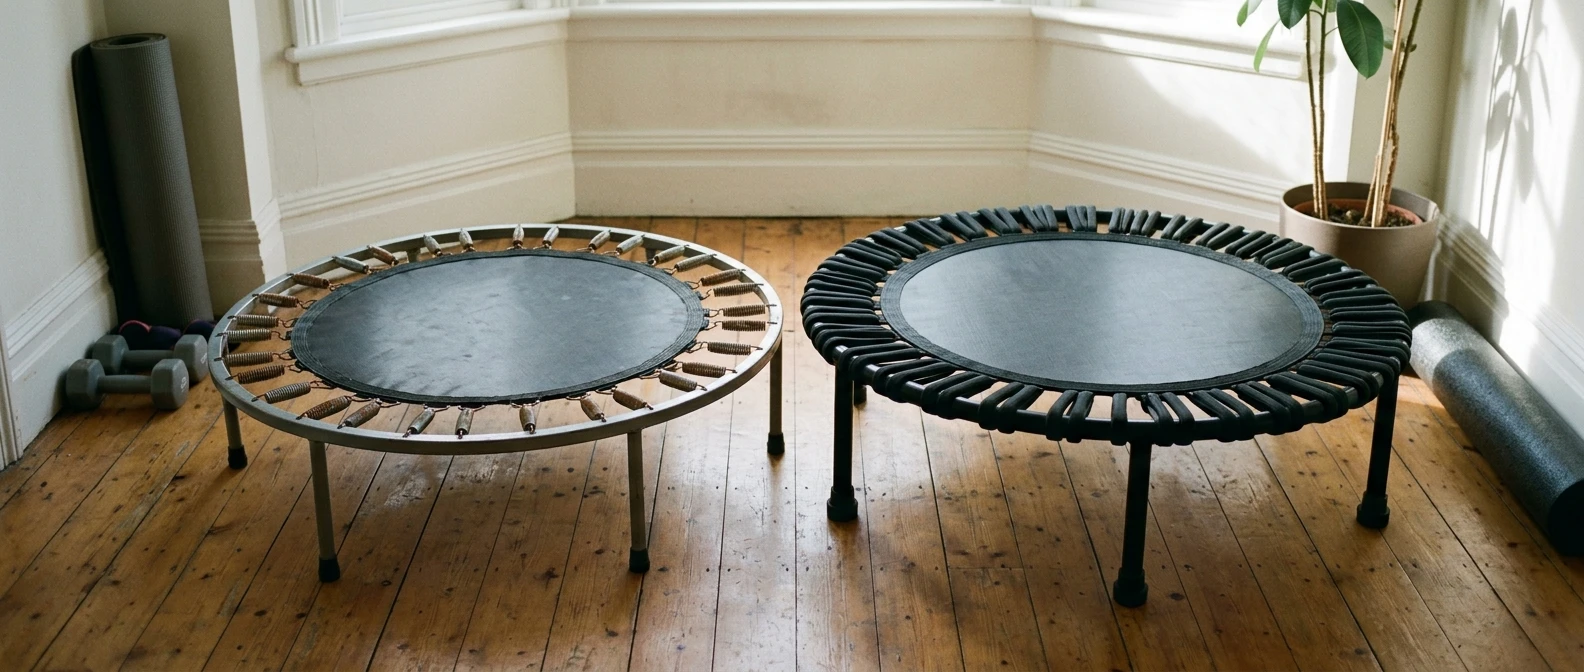
Rebounders look almost identical in photos. A round frame, a stretched mat, a handful of legs underneath. But put a £40 model next to a £300 one side by side and the difference becomes obvious the moment you step on: one flexes evenly and absorbs your landing, the other bottoms out and sends the shock straight back into your knees. After 50, that difference is not cosmetic. It is the line between a piece of equipment that protects your joints and one that quietly works against them.
If you have not already read about why rebounding is worth doing in the first place, our benefits of rebounding article covers that ground. This one assumes you are past that question and ready to buy. The goal here is narrower and more practical: which specs actually matter, which ones are marketing noise, and how to match a rebounder to your particular knees, your particular hips and your particular living room.
Why the Right Rebounder Matters More After 50
A rebounder’s whole job is to absorb impact and return a controlled amount of energy back through your legs. When that mechanism is well built, it takes a large share of the load that would otherwise land on your knees and hips. When it is poorly built, that load either disappears entirely (so you are just bouncing on a stiff, lifeless surface) or it transfers unevenly, twisting an ankle or jarring a hip on a slightly off-centre landing.
At 25, a mediocre rebounder is an inconvenience. At 55 or 65, with joints that have less cartilage cushioning and a balance system that reacts a touch slower than it used to, a mediocre rebounder is a genuine injury risk. The springs, the mat tension, the frame height and the stability aids are not features to skim past. They are the parts of the product that decide whether rebounding helps you or hurts you.
Bungee Cords vs Metal Springs: Which Is Kinder to Your Joints
This is the single biggest decision in the whole purchase, and it is worth understanding properly before you look at anything else.
Metal spring rebounders are the older, cheaper design. The springs give a firmer, more responsive bounce, but that responsiveness comes with two problems for older joints: the rebound is sharper and less forgiving on landing, and the springs tend to be noisier, both audibly (a metallic creak with every bounce) and literally, in that you can feel a harder jolt through your feet and ankles.
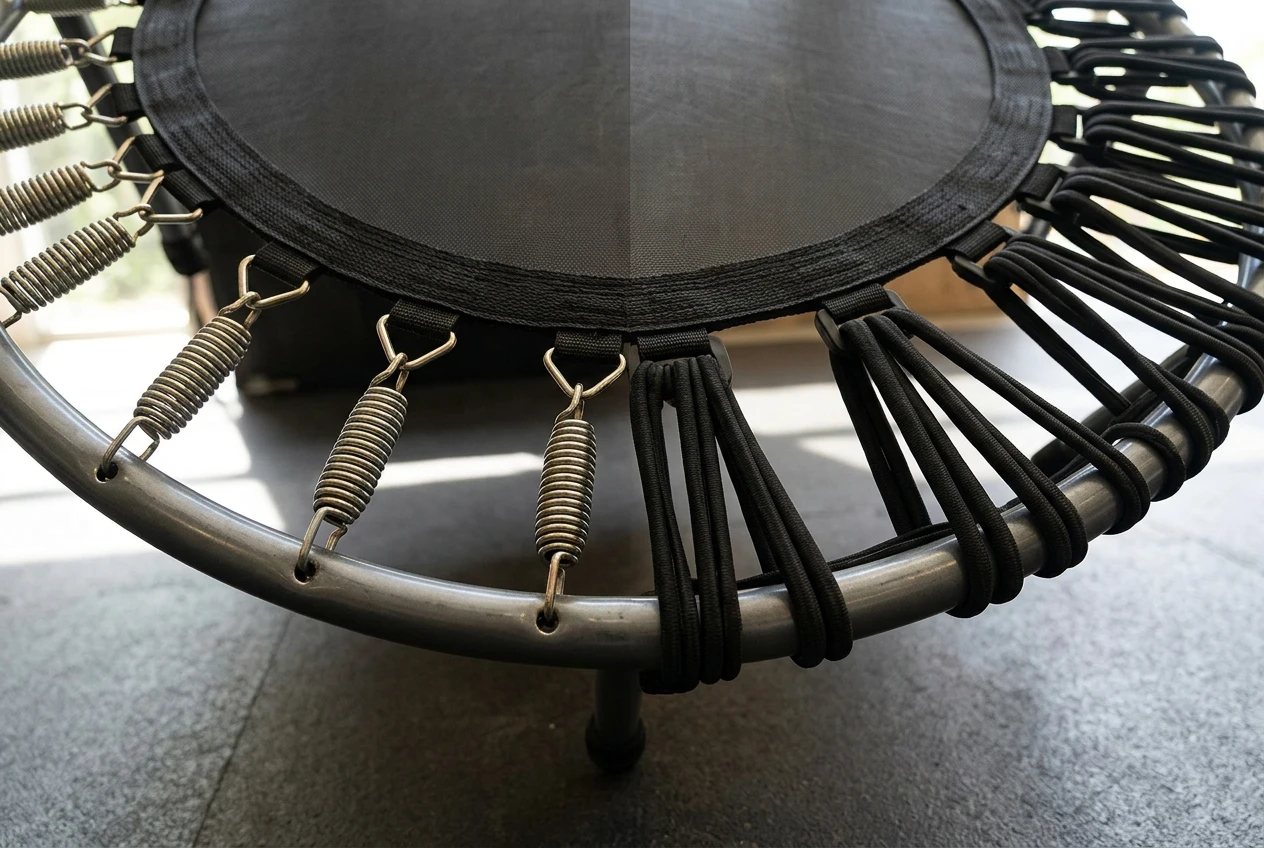
Bungee cord rebounders use elasticated cords instead of coiled springs. The bounce is softer, more cushioned, and considerably quieter. For anyone with knee pain, hip replacements, arthritis or balance concerns, this is almost always the better choice. The gentler rebound means less peak force travelling up through the joints on each landing, and the lower noise means you are not straining to balance while also wincing at a squeak under each foot.
The trade-off is that bungee cords typically cost more and the bounce feels slightly less “springy” if you are coming from a traditional trampoline background. For most people over 50, that is a trade worth making. If a listing does not specify which system it uses, treat that as a gap to fill in before you buy, not a detail to shrug off.
Mat Tension, Size and Weight Capacity: The Numbers to Check
Beyond the spring question, three numbers tell you almost everything about how a rebounder will actually feel underfoot.
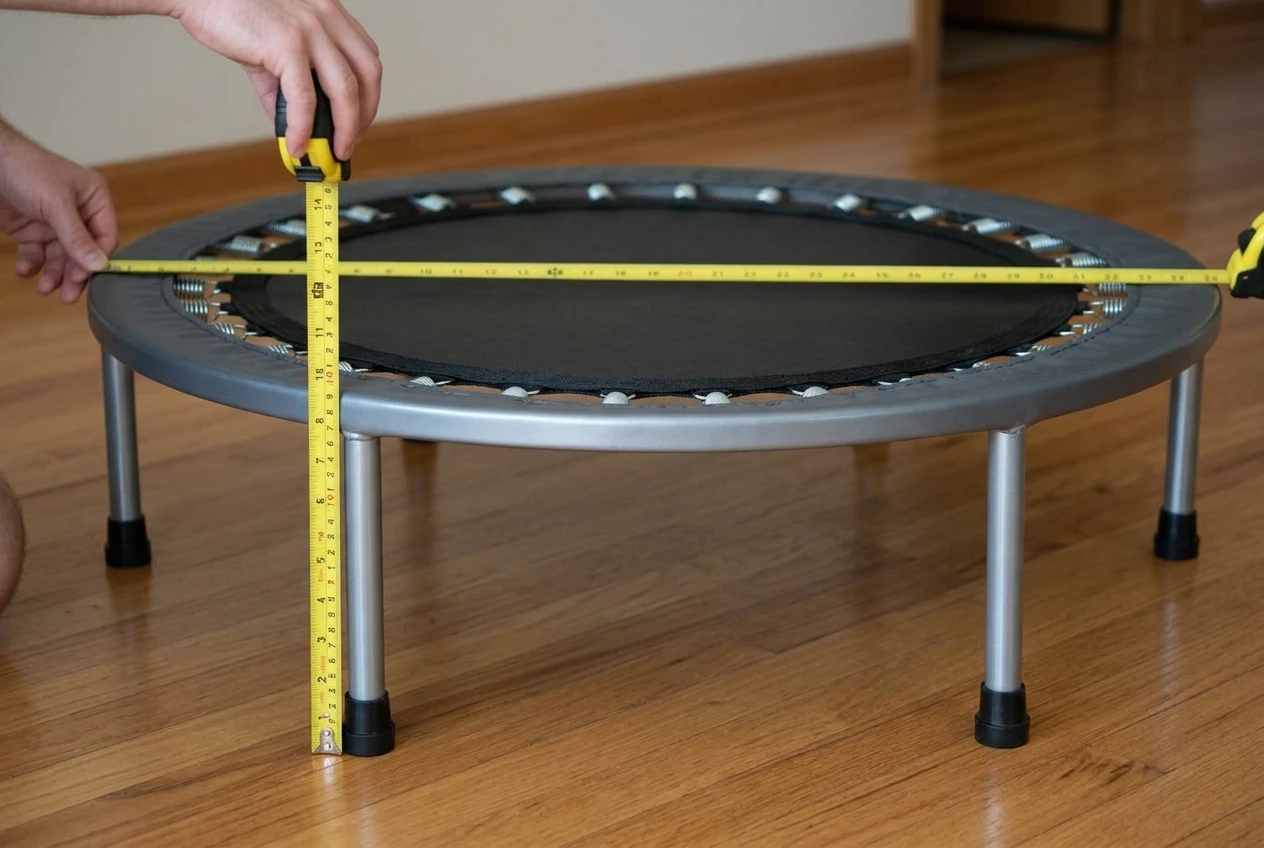
Mat diameter. Most home rebounders run between 36 and 44 inches. A smaller mat concentrates your bounce into a tighter central zone, which is useful in a small room but less forgiving if your balance drifts during a session. A larger mat gives you more room to land slightly off-centre without feeling it, which matters more than people expect once balance becomes a genuine consideration.
Weight capacity. This is listed by every manufacturer and ignored by far too many buyers. A rebounder rated to handle noticeably more than your own body weight will flex less under you and hold its shape for longer. If your weight sits close to the stated maximum, the mat will sag faster, the tension will loosen within months, and the bounce will become unpredictable. Buy with headroom, not right up to the limit.
Frame height. Lower frames, generally under 9 inches off the floor, are easier and safer to step on and off, which matters a great deal if getting down to or up from a low surface is already awkward for you. Taller frames can feel more “trampoline-like” but add an extra consideration every time you mount or dismount.
Together, these three numbers tell you far more about real-world comfort than any marketing copy about “cardio burn” or “lymphatic drainage” ever will.
Stability Bars and Balance Aids: Worth It or Not
A stability bar is a waist-height handle that attaches to the rebounder frame, giving you something to hold while you bounce. For a reader with any history of balance issues, vertigo, inner ear problems or a previous fall, this is not an optional extra. It is the feature that makes rebounding usable at all.
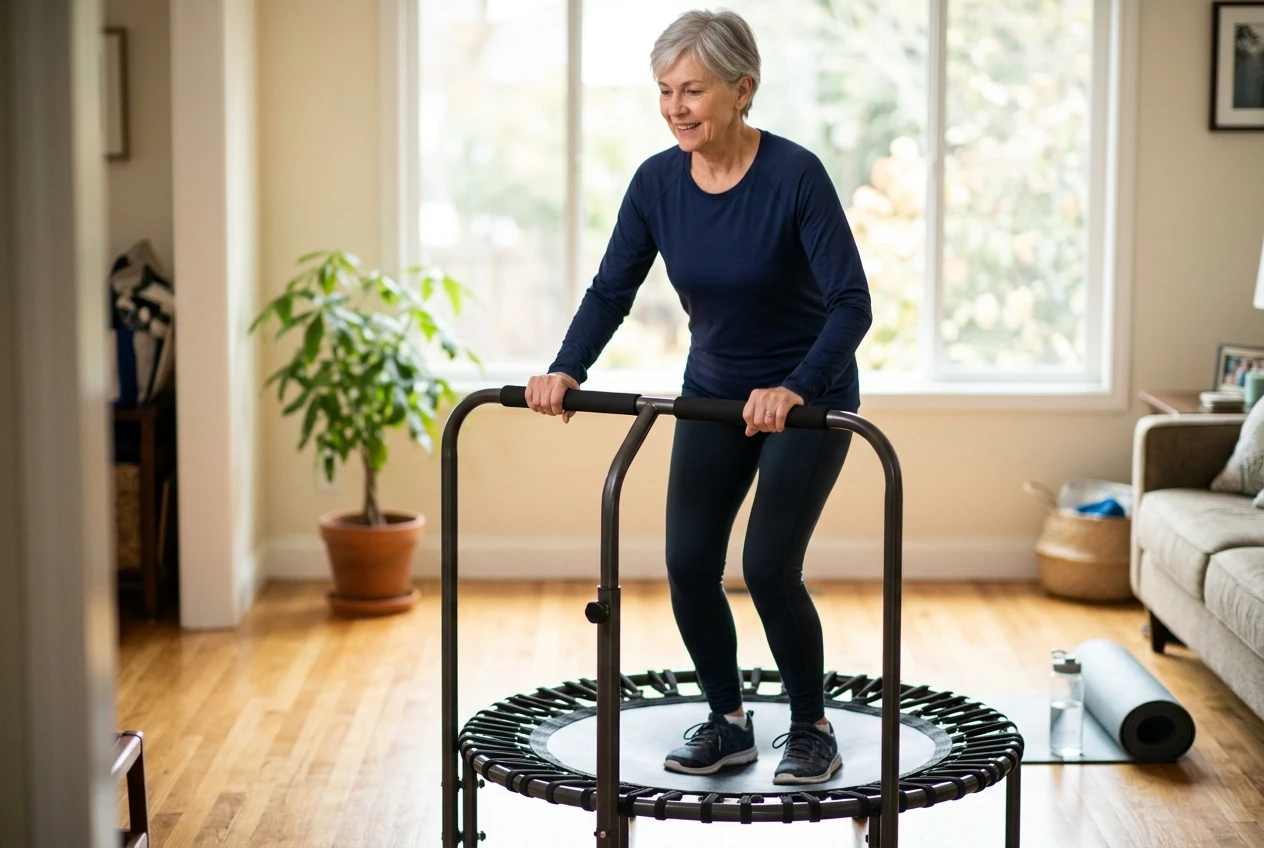
Even for readers without a specific balance concern, a bar is worth having for the first few weeks. Your body needs time to learn how to read and respond to an unstable surface, and that learning curve is exactly when falls happen. A bar you can let go of once you are confident is a far better starting point than a bare mat you have to be confident on from session one.
Look for a bar that is height-adjustable and that bolts or clamps securely to the frame rather than one that simply rests against it. A wobbly bar is worse than no bar, because it gives a false sense of security right up until it moves.
Some rebounders also include foam safety pads over the springs or cords, which stop toes catching underneath during a bounce. This is a small detail but a genuinely useful one if you tend to land slightly off-centre.
Noise, Floor Protection and Space: What Small Homes Need to Know
Rebounding in a flat, a terraced house, or any home with people below or beside you raises a question that gym equipment guides rarely address directly: how much noise does this actually make, and does it travel through the floor.
Bungee cord models are quieter by design, as covered above, but the frame and feet matter too. Rubber-capped feet reduce both noise and the chance of the frame sliding on a hard floor. A rebounder with bare metal feet on laminate or tile will both skid slightly under load and transmit far more impact noise into the structure of the building.
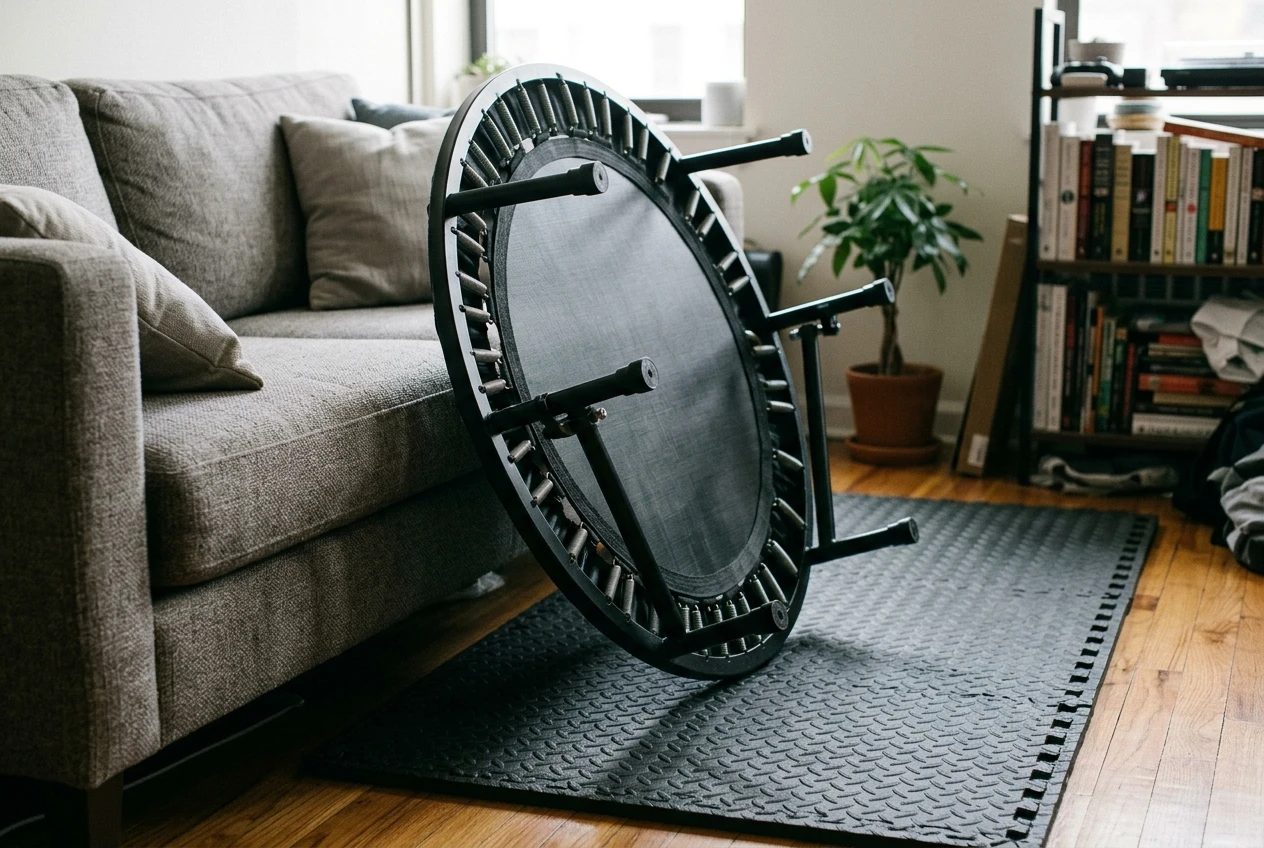
A rubber gym mat placed underneath the rebounder solves most of this. It dampens vibration, protects the floor from scuffing, and stops the whole unit creeping across the room during a session, which can happen more than people expect once you build up a rhythm.
On space, a folding frame is worth paying attention to if you are in a smaller home. Many rebounders fold flat or collapse their legs for storage under a bed or behind a sofa, which matters if the rebounder needs to disappear between sessions rather than live permanently in the middle of a room. If floor space is tight generally, it is worth reading our guide to home gym equipment for over 50s, which covers how a rebounder fits alongside other joint-friendly equipment in a limited footprint.
Matching a Rebounder to Your Situation: Small Space, Bad Knees, Tight Budget
Nobody is buying a rebounder in the abstract. You are buying one for a specific knee, a specific room and a specific budget, so it helps to think in terms of your actual situation rather than a generic “best” list.
Small space. Prioritise a folding frame and a smaller mat diameter, around 36 to 38 inches. You will give up a little landing margin, but a rebounder that is quick to fold and tuck away is one that actually gets used, rather than one that becomes a trip hazard in a hallway.
Bad knees or hips. Bungee cords are close to non-negotiable here. Pair them with a stability bar, a weight capacity well above your own body weight, and the lowest frame height you can find. The combination of a soft landing, something to hold, and an easy step-off addresses the three biggest risk points for anyone managing joint pain.
Tight budget. Spring-based rebounders are cheaper and that is a legitimate reason to choose one, but do not cut corners on the weight capacity rating or the presence of rubber feet. If the budget stretches to one upgrade over the cheapest option available, make it the stability bar rather than a bigger mat. A bar changes whether you can use the thing safely; mat size is a comfort upgrade by comparison.
Whichever category you fall into, the honest move is to compare two or three specific listings against these numbers rather than relying on star ratings alone, since a product can have excellent reviews from younger, fitter buyers and still be a poor fit for your joints specifically.
Setting Yours Up Safely for the First Session
Once the rebounder arrives, the setup matters almost as much as the purchase decision. Place it on a flat, hard floor rather than carpet, which can hide an uneven base and make the frame rock slightly. Use a rubber mat underneath if your floor is hard flooring, both for noise and for grip.
Clear a genuine radius around the unit, at least an arm’s length in every direction, so a stumble has somewhere to go that is not into a coffee table or a radiator. If you bought a stability bar, fit it before your first bounce rather than after, and keep a hand on it until your balance has adjusted to the moving surface, which can take several sessions rather than one.
Start barefoot or in thin-soled shoes rather than trainers with thick cushioning, since a thick sole between your foot and the mat makes it harder to feel what the surface is doing underneath you, which matters more on an unstable surface than on solid ground.
Compare the rebounder options linked in this guide and pick the one that matches your joints and your space before your first session.